Important: Before submitting a funding application to a sponsor, a Principal Investigator (PI) must secure University approval for the proposal through the My Research Application (MRA) system.
- Ensure you have access to MRA as soon as you know you need to submit an application (log into MRA and check if you see the Applications & Agreements tab listed below in step 2)
- Log into MRA at least one week before the internal deadline date to create and submit the MRA
- Once you submit your MRA, it will route electronically to the required internal approvers as determined by the system (Chair, Dean, Hospital VP, or Provost) ending at the Research Services Office or Innovations and Partnerships Office (RSO / IPO)
- Reviewers will get twice-daily reminders of their review task until they have completed their review
- You will receive an email from raise@utoronto.ca indicating if your MRA has been returned for revisions at any point in the approval process
- If your MRA is returned, revise and resubmit it
- You will receive an email from raise@utoronto.ca when your MRA has been approved by RSO or IPO
- Either submit a digital or hard copy to the sponsor
- Sponsors using online systems: submit your final proposal through their system and RSO / IPO will approve and forward it to the sponsor
- Paper Submissions: RSO / IPO will sign the application and you can forward the hard copy to the sponsor
Log into the My Research system at least one week prior to the internal deadline.
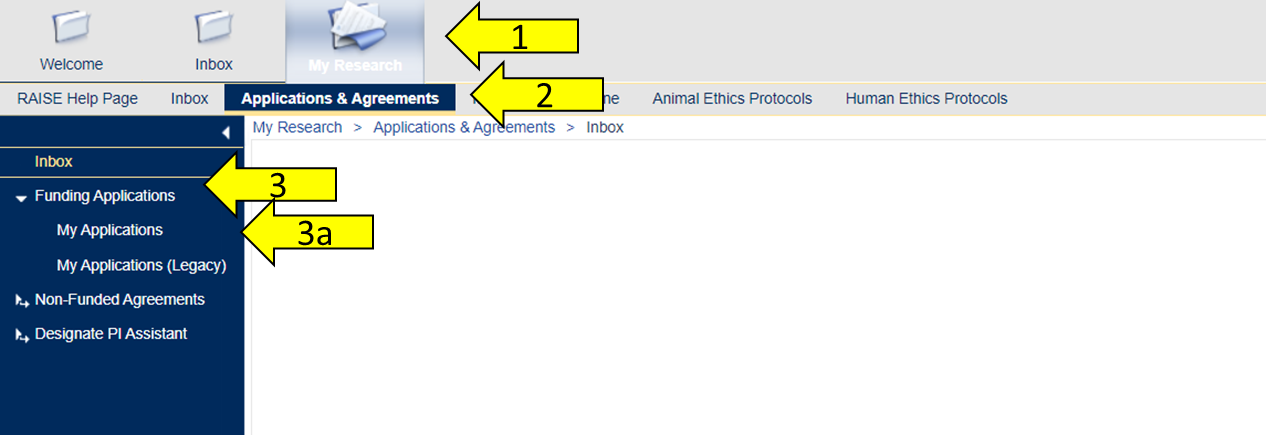
Click on the following links in sequence.
- My Research
- Applications & Agreements
- Funding Applications
-
My Applications
*Note: Clicking on the Funding Applications menu item will take you to the new applications search list directly. If you click on the arrow to the left of Funding Applications, the dropdown menu will expand to show two items:
- My Applications: Used to create new applications or continue working on applications created on or after August 30, 2021.
- My Applications (Legacy): Used to continue working on applications created before August 28, 2021.
-
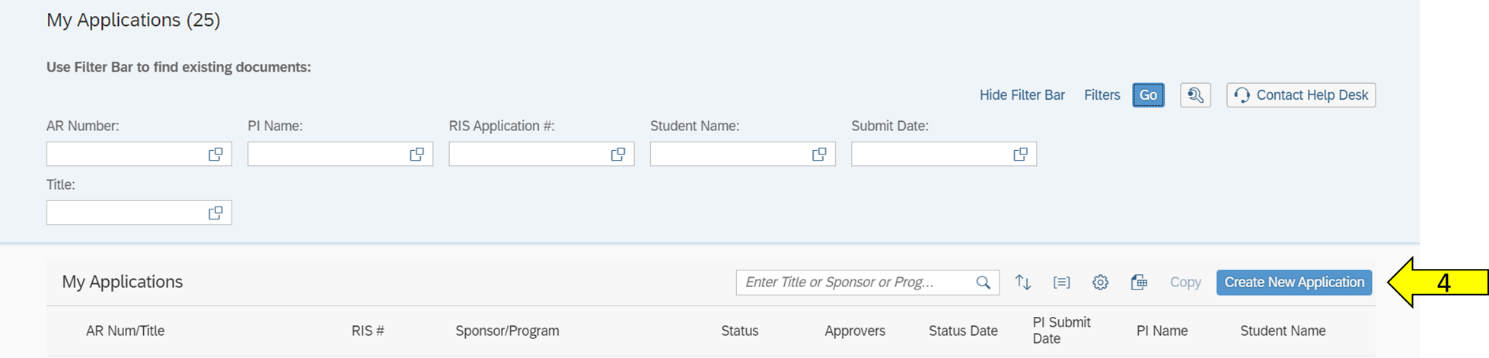
You are now on the My Applications search list in a separate browser tab.
- Click on the blue Create New Application button on the right-hand side to create a new MRA record.
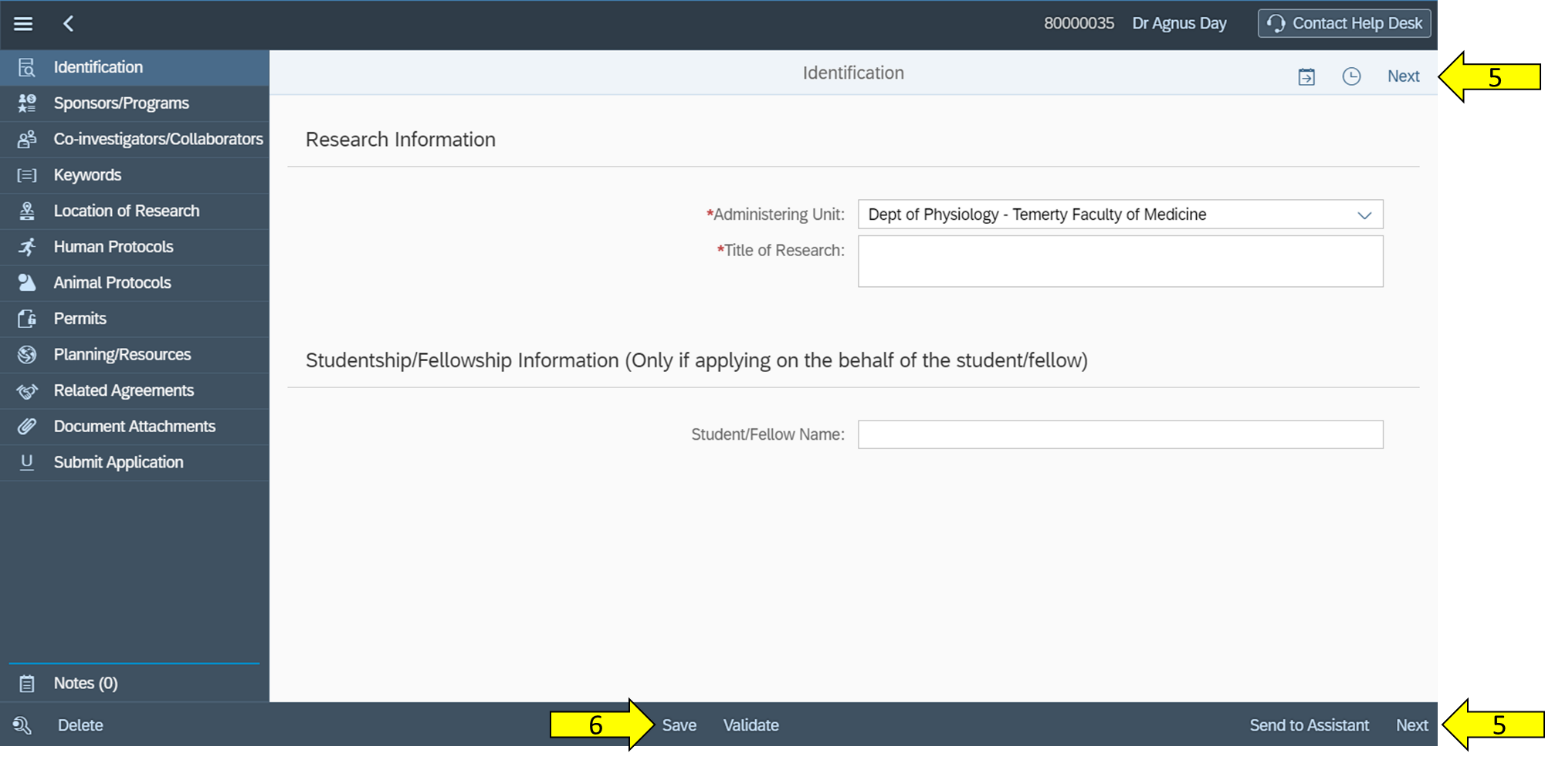
You are now on the Identification (first) page of the MRA record.
- Complete each page and click on the Next or Previous button at the top and bottom of each page to navigate through the application form, or skip directly to a specific page by clicking on the page name from the left navigation menu. You don’t need to complete the pages in order as long as all the mandatory fields (marked with a red asterisk) have been filled in prior to submission. Note that you can check that you have completed all mandatory fields by clicking the Validate button at the bottom of the screen at any time (see step 12 for more details on error checking).
- The system automatically saves your work as you navigate from one section to another, however, if you would like to close your application before submitting it, click on the Save button to save the contents of the page that is open, then click on the back arrow in the top left corner of the screen to return to the My Applications search list.
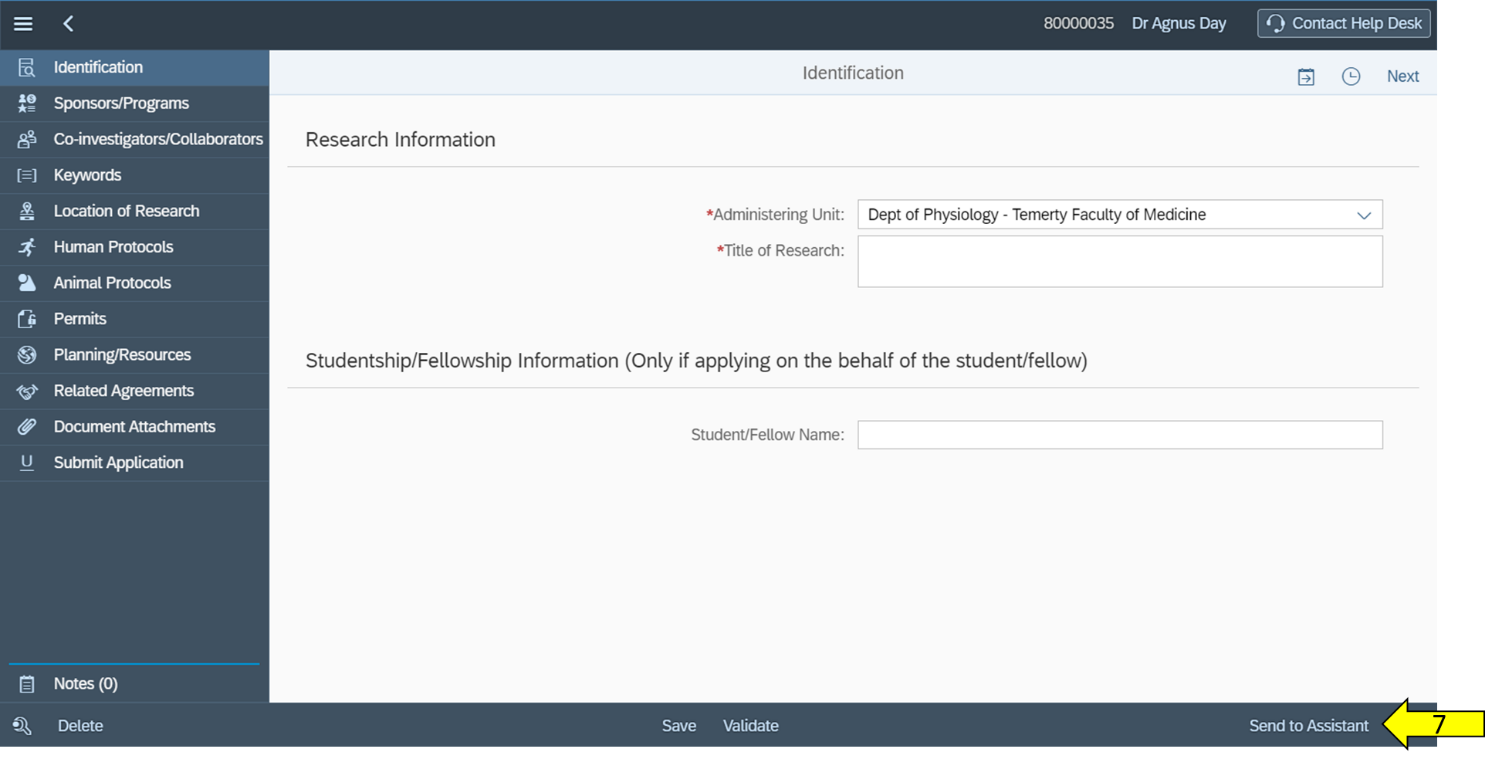
- If you wish to forward your MRA to a PI Assistant for completion, ensure you have designated the staff person as your PI Assistant and then click on the Send to Assistant button at the bottom of any page. This will display a Select Assistant dialogue box that will allow you to specify the PI Assistant and set a Deadline Date for when the application should automatically return to you. Click OK to send an email alert to your PI Assistant and they will be able to edit your MRA via their own access. You can reclaim the MRA at any time by clicking the Reclaim button at the bottom of any page.
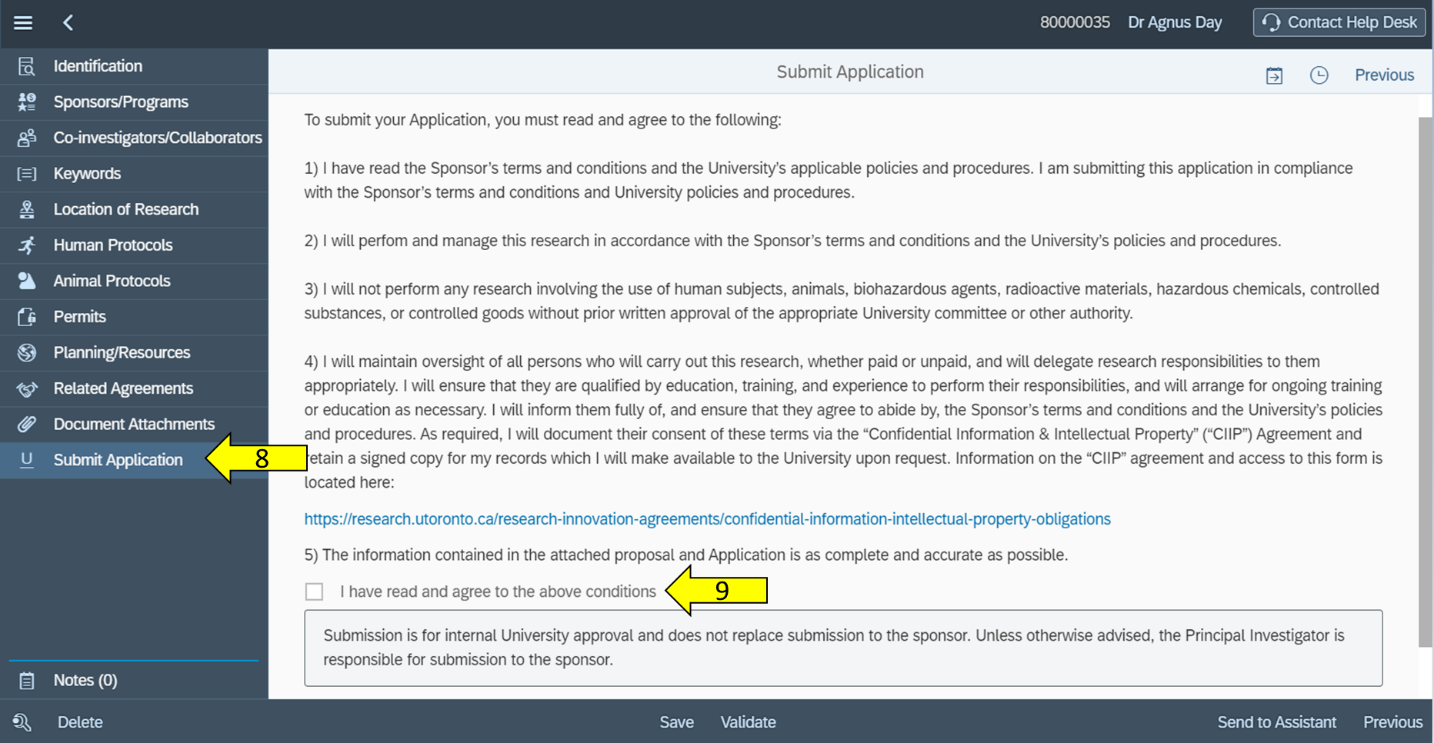
Complete the following steps to submit your MRA.
- Navigate to Submit Application
- Read and agree to the PI Undertaking by checking the I have read… box
- Click on the Submit button
-
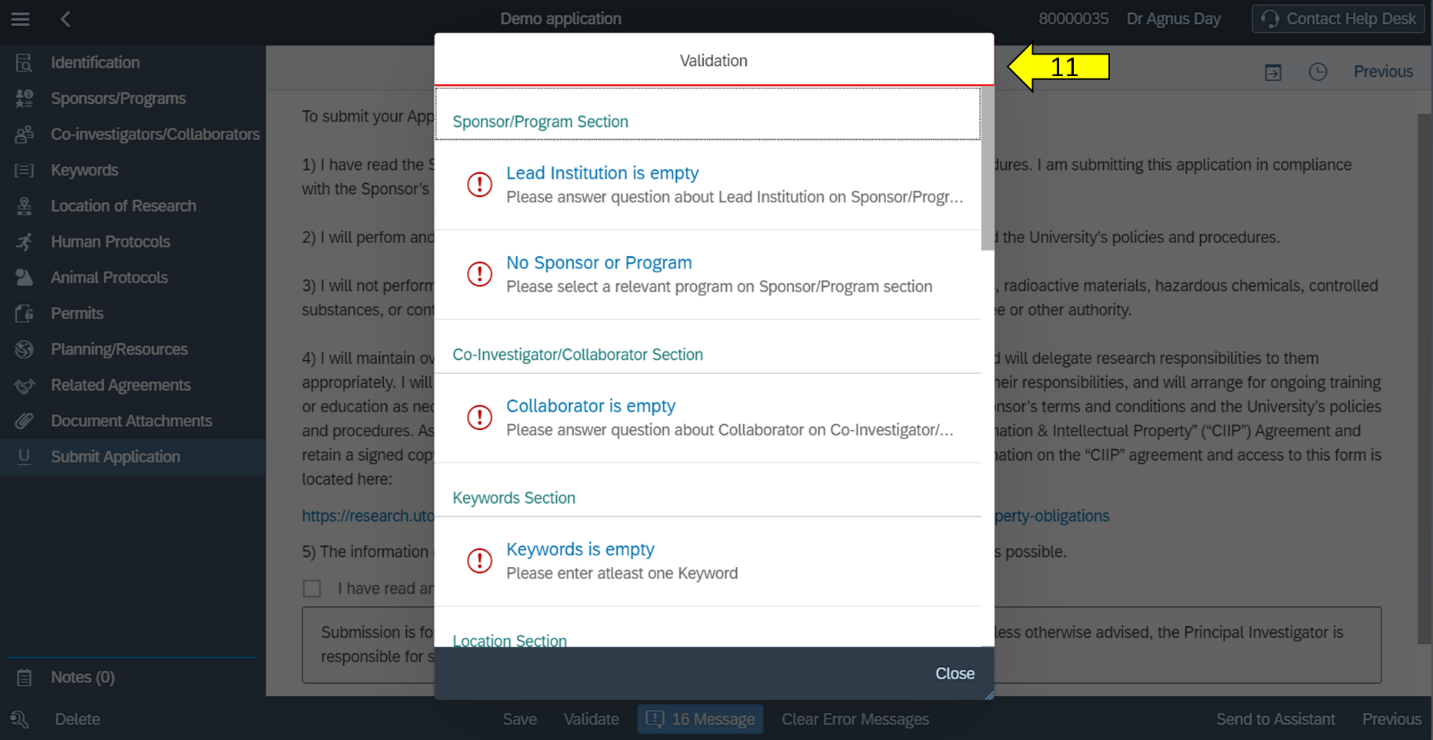
If your application is missing data, the Submit pop-up page will not appear. If you are missing mandatory fields, a list of errors will appear with direct links to the pages containing those errors. You can directly view the error by clicking on the error links. Once you’ve cleared the errors, return to the Submit Application page, check the I have read… box and press the Submit button again.
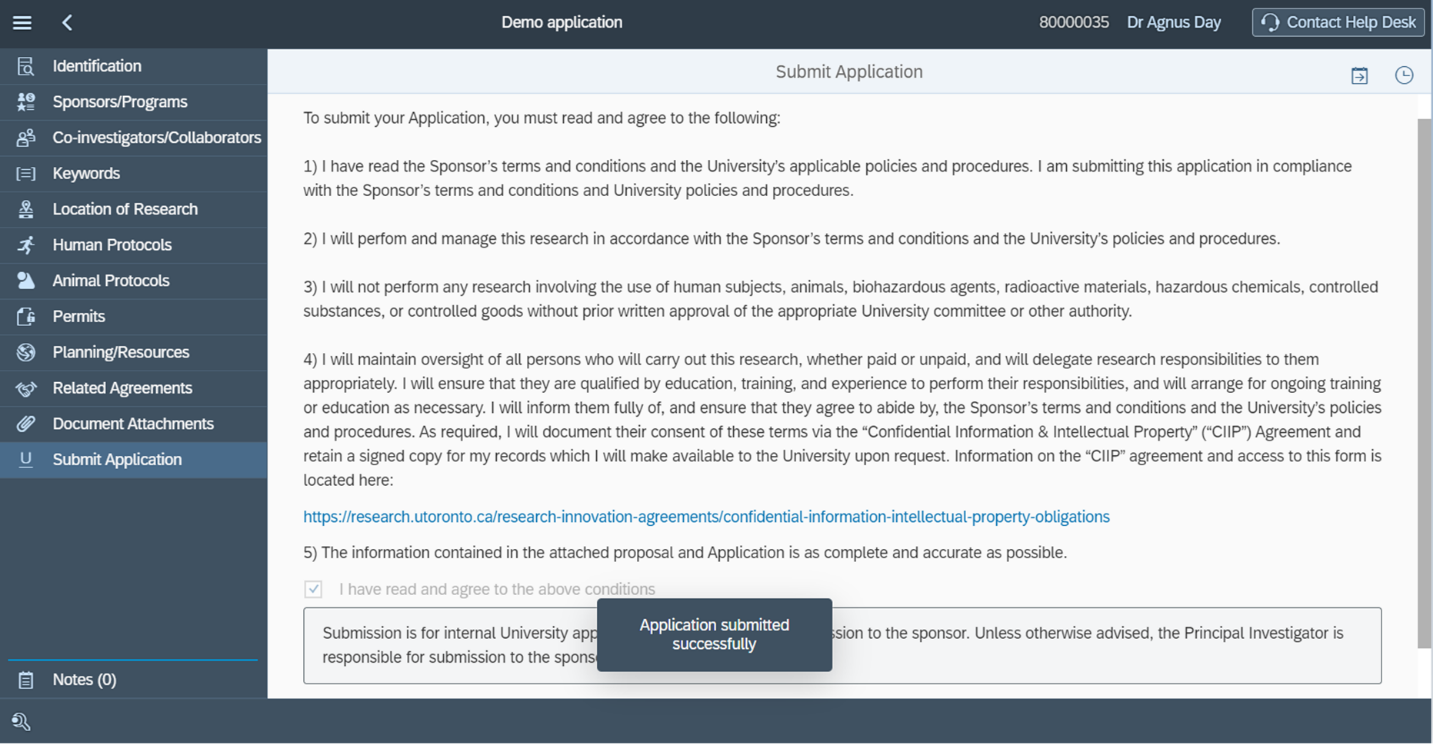
When your submission is successful, you will see a confirmation notification at the bottom of the screen. To return to the My Applications search list, click the back arrow at the top left corner of the screen.
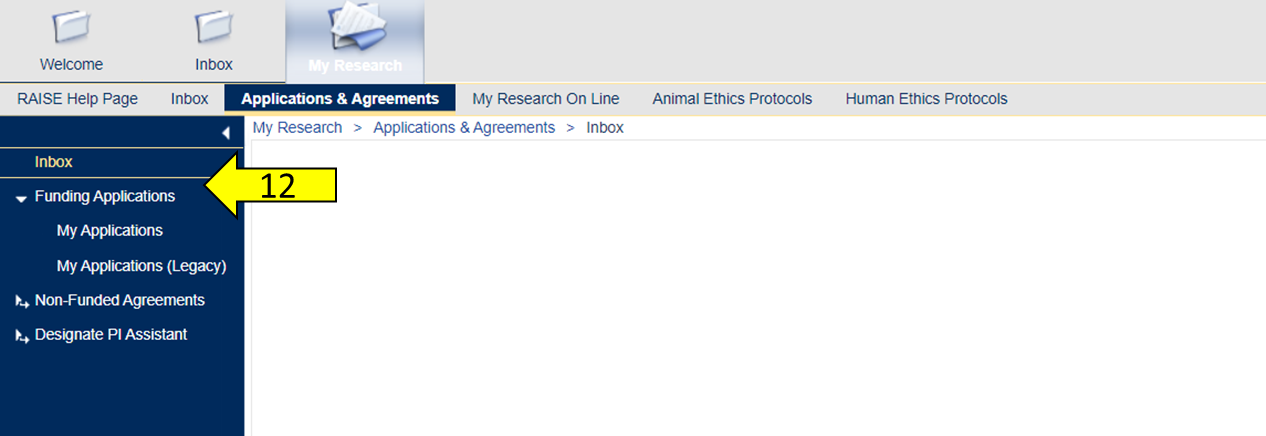
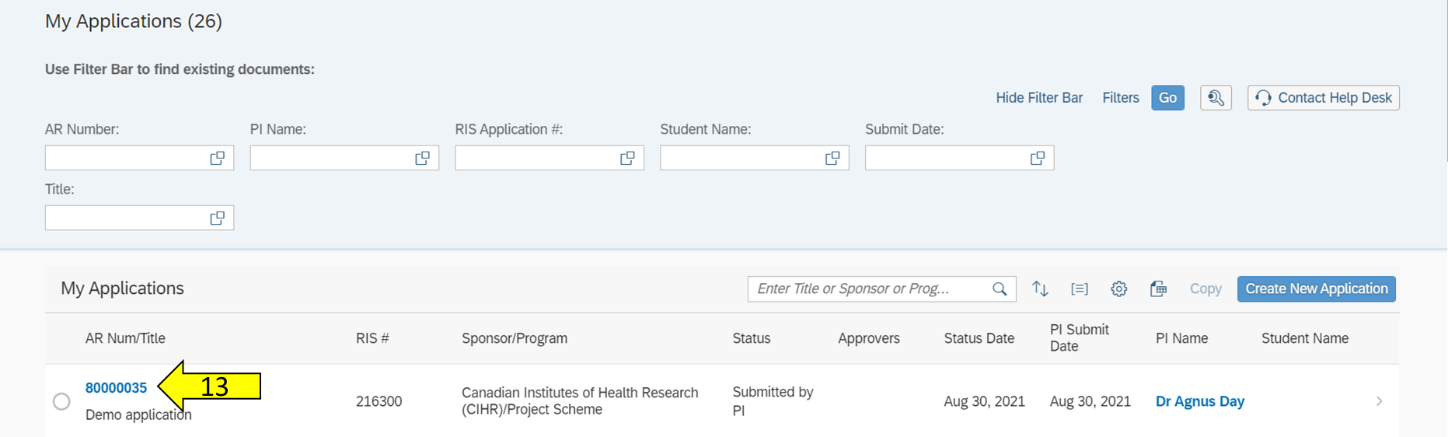
To retrieve an MRA that was closed before it was submitted, follow the steps below.
- Select Funding Applications to display all your applications at any stage of development.
- Find the application you want to access. Click on the AR Num (the 8-digit number shown as a blue hyperlink) corresponding to the application to display the MRA record. Note that you can only edit applications that have not yet been submitted or forwarded to a PI Assistant, (although you can reclaim an application forwarded to a PI Assistant at any time.).
Please see My Research Applications & Agreements for links to training opportunities, the user guide, and Frequently Asked Questions (FAQs).
- Provide and facilitate access to MRA
- Provide training
- Provide user support via the RAISE Helpdesk

Staff
Staff
Staff